


- Recipes
- Nigella’s Peach Melba Pavlova

Nigella’s Peach Melba Pavlova

-
8 serving
Prep time:
Cook time:
Serves: 8
Share recipe
Ingredients
- 4 large eggs, whites and yolks separated
- 2 pinches fine sea salt
- 250g caster sugar, plus 30g
- 3 tsp cornflour
- 1 tsp white wine vinegar
- 600ml double cream
- 150ml whole milk
- 2 tsp vanilla extract
- 300g raspberries
- 2 tbsp icing sugar
- 1 tsp lemon juice
- 4 M&S Perfectly Ripe Yellow Peaches, stoned and cut into long slices
Method
Step 1
Preheat the oven to 180°C/160°C fan/gas 4 (though it would be better to have the fan off). Meanwhile, line a flat baking sheet with baking paper. Draw round a 22 cm-diameter plate or cake tin to create a circle in the middle of the paper.
Step 2
For the base, whisk the egg whites with 1 pinch of fine sea salt using an electric whisk until satiny peaks form. Beat in 250g caster sugar a spoonful at a time until the meringue is stiff and shiny – be patient: the trick is to whisk fast and add sugar slowly.
Step 3
Sprinkle over 2 tsp of the cornflour and the vinegar, then, by hand using a spatula, gently but thoroughly fold everything together. Dab the paper with a little meringue mixture on 4 corners (on the side you’ve drawn the circle), then turn it the other way around, so the paper is stuck to the baking sheet. Pile your pavlova mixture within the circle you’ve drawn, then, with a small cranked palette knife, form it into a flat-topped, straight-sided fat disc, following your circle as a guide and smoothing the sides and top.
Step 4
Place it in the oven, then immediately turn the temperature down to 150°C/130°C fan/gas 2 (again, fan off if you can) and cook for 1 hr. The top should feel crisp if you tap it.
Step 5
Leave the oven door ajar while you allow the pavlova base to cool inside for 15-20 mins. Then take it out (still on its baking sheet) and leave to cool completely. The minute it’s properly cold, you can store it in an airtight container until the next day, if you like. I recommend a large cake caddy, though if you have a double-oven, you could stash it in a cold oven till needed.
Step 6
While the pavlova base is baking, get on with the custard. In a wide measuring jug, and using a flat hand whisk, whisk together the egg yolks with the remaining 30g caster sugar, 1 tsp cornflour and pinch of salt.
Step 7
Pour 250ml of the double cream and the milk into another measuring jug and heat in the microwave for 2 mins on high (or simply warm in a pan), then, whisking as you go, pour slowly into the egg yolk mixture, scraping up any egg yolk stuck to the bottom of the jug.
Step 8
Pour into a wide-ish, heavy-based saucepan, scraping it out with a spatula, and whisk again just to make sure everything’s well combined. Put the pan over a medium-low heat and cook, stirring constantly with a wooden spoon (though keep the hand whisk nearby) for 6-7 mins, until the custard has thickened; towards the end of this time, regularly take the pan off the heat and give the custard a brisk whisk. The custard won’t be enormously thick, but it will thicken further once it’s been in the fridge overnight. To test if it’s about right for now, coat the back of the wooden spoon and draw through the custard with your finger – it should leave a clean stripe.
Step 9
Take the pan off the heat and whisk in the vanilla extract, then pour back into a measuring jug to cool. Press a slightly dampened, scrunched piece of baking paper on top to stop a skin forming (or use cling film) and leave for an hour or two to cool, then put in the fridge for at least 6 hrs or overnight.
Step 10
Just before serving, blend the raspberries with half the icing sugar and half the lemon juice until completely liquidised. I like to do this in a bullet blender as it makes it smooth enough, I feel, to serve as it is. If you’re using a processor, you’ll have to push it through a strainer or fine sieve. But first, taste the sauce to see if you need the remaining icing sugar or lemon juice, whizzing it up again if you’ve added more. Strain the sauce if needed.
Step 11
I prefer to assemble the pavlova at the last minute. Don’t worry that your cold pavlova base is cracked on top and slightly splintered around the sides; this is inevitable if we want a marshmallowy centre, as we most certainly do! Delicately invert the meringue onto your plate of choice, then peel off the baking paper, so the tender, squidgy side is now uppermost.
Step 12
Whip the remaining 350ml double cream for the topping with an electric whisk until it’s softly thickened but not stiff. Spread the cream over the inverted pavlova on top of the marshmallowy base, swirling it to create texture with dips and peaks.
Step 13
Arrange the peach segments higgledy piggledy on top of the cream. With a teaspoon, drizzle a little of the raspberry sauce over, and then do the same, a little more exuberantly, with the custard, zigzagging it so some drips enticingly down the sides.
Step 14
Cut the pavlova into slices, pouring more raspberry sauce and custard over as you serve, and do let your guests pour even more of both as wished.
Tips or serving suggestions
Allow the meringue to cool completely before adding the toppings, and allow approx. 2 hrs cooling and at least 6 hrs chilling for the custard.
Shop the ingredients
-
On OfferValueLIFE 1w+
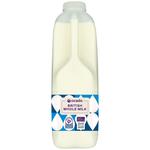
Ocado British Whole Milk 2 Pints 1.136L
1.136L£1.20
£1.06 per litreFor over 10,000 products you know (and love), we now match the price of your like-for-like shop to tesco.com, including promotions and Clubcard prices. If we’re not already the same price or less, we’ll email you a voucher for the difference within 72 hours. Everyday Savers -
ValueLIFE 6d
Ocado British Double Cream 600ml
600ml£2.30
38.3p per 100mlFor over 10,000 products you know (and love), we now match the price of your like-for-like shop to tesco.com, including promotions and Clubcard prices. If we’re not already the same price or less, we’ll email you a voucher for the difference within 72 hours. Everyday Savers -
OtherLIFE 1w+
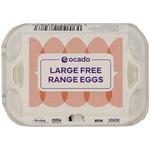
Ocado Large Free Range Eggs 6 per pack
6 per pack£1.85
30.8p eachFor over 10,000 products you know (and love), we now match the price of your like-for-like shop to tesco.com, including promotions and Clubcard prices. If we’re not already the same price or less, we’ll email you a voucher for the difference within 72 hours. -
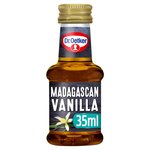
Dr. Oetker Madagascan Vanilla Extract 35ml
35ml£1.45
41.4p per 10mlFor over 10,000 products you know (and love), we now match the price of your like-for-like shop to tesco.com, including promotions and Clubcard prices. If we’re not already the same price or less, we’ll email you a voucher for the difference within 72 hours. -
Ocado White Wine Vinegar 500ml
500ml£1.85
37p per 100mlFor over 10,000 products you know (and love), we now match the price of your like-for-like shop to tesco.com, including promotions and Clubcard prices. If we’re not already the same price or less, we’ll email you a voucher for the difference within 72 hours.